 Forefront
Class Settings
Renaming a class and managing its teachers, students, course and curricula.
The Class Settings page is where you manage the people and course attached to a class: its teachers, its students, and which of the course’s curricula are active for the class.
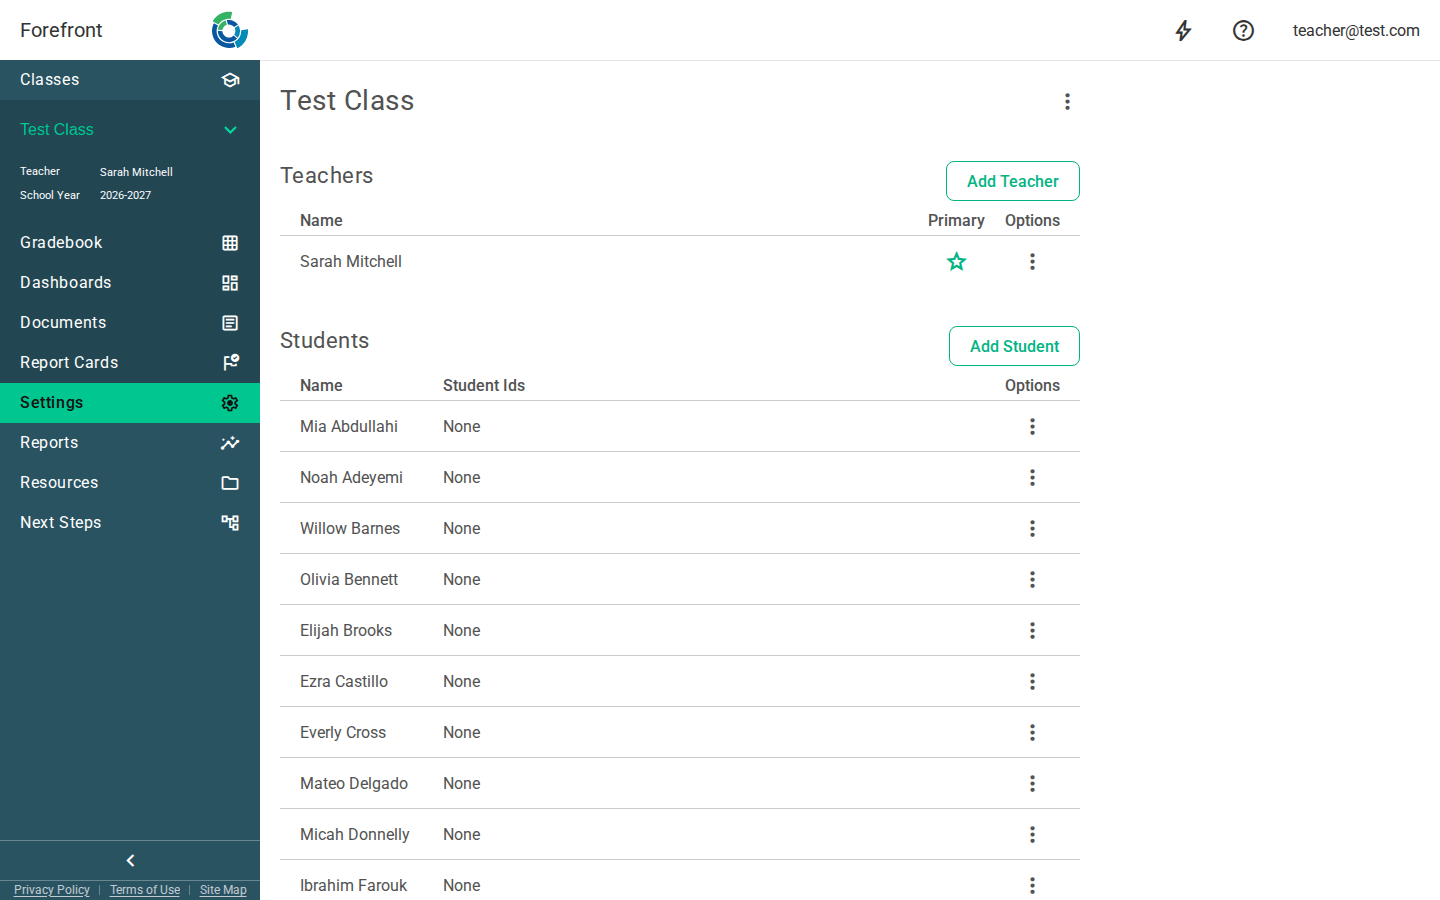
Class name
The class name is shown at the top, along with a tag if the class has one. Use the menu (⋮) next to the name to rename the class or access other class-level actions.
Teachers
The Teachers table lists everyone teaching the class. A ⭐ marks the primary teacher. Use Add teacher to assign another teacher, and each row’s options menu to change the primary teacher or remove a teacher. (Editing options only appear if you have permission to modify the class.)
Students
The Students table lists enrolled students and their student IDs. Use Add student to enroll students one at a time, Import from File to enroll a whole list at once, and a row’s options menu to manage or remove a student.
Importing students from a file
If you have a list of students for a class (from a spreadsheet, your student information system, or another teacher), you can enroll them all at once with Import from File. The button appears for Building Leaders and district-level users. Teachers don’t see it, because a teacher can only add students who are already in one of their classes; teachers can still use Add student.
Importing enrolls students who already exist in Forefront. It doesn’t create new student records. A student who isn’t in Forefront yet needs to be added to your roster first.
Click Import from File and follow the three steps in the window that opens:
- Choose the student ID your file uses. The dropdown lists the kinds of student ID your district uses, such as Local, State, or SIS.
- Download the template and fill in one student per row. Every row needs the student’s ID. First and last names are optional; Forefront uses them to find a student whose ID it can’t find.
- Upload the finished file. Drag it into the box or click Choose file. The file must be saved as CSV. If Forefront can’t read the file, a message explains why and you can choose another file.
You don’t have to use the template. Any CSV file works as long as its first row has column headings Forefront recognizes, such as Local ID, State ID, SIS ID, First Name, and Last Name. A column headed just ID or Student ID is read as the ID type you chose in step 1.
Next you’ll see a review of every row in your file:
- Matched rows show the ID or name from your file, an arrow, and the student it matched, so you can check each one.
- Already in class rows are students who are already enrolled. They’re shown but not added again.
- Unmatched rows show why: no match, more than one student with that name, no name or ID in the row, or a student you don’t have access to. Search for the right student by name in the box on that row, or leave it unmatched.
- Click ⊘ on any row to skip it, and click it again to bring the row back.
Click Confirm to enroll the matched students, or Back to choose a different file. A message tells you how many students were added.
Course & curricula
The Course section shows the course the class is tied to and lists that course’s curricula. Each curriculum has an Active toggle that controls whether it’s in use for this class. If you can modify the class, an edit control lets you change the assigned course.
Permissions
Editing controls (add/remove, menus, course editing) appear only when you have permission to modify the class. If you’re viewing a class you don’t manage, you’ll see the information without the editing actions.