 Forefront
Students Management
Managing student records across the district.
The Student Management page is the district-wide roster of student records. From here you can create students, search and page through everyone in the district, edit or disable individual records, and merge duplicates.
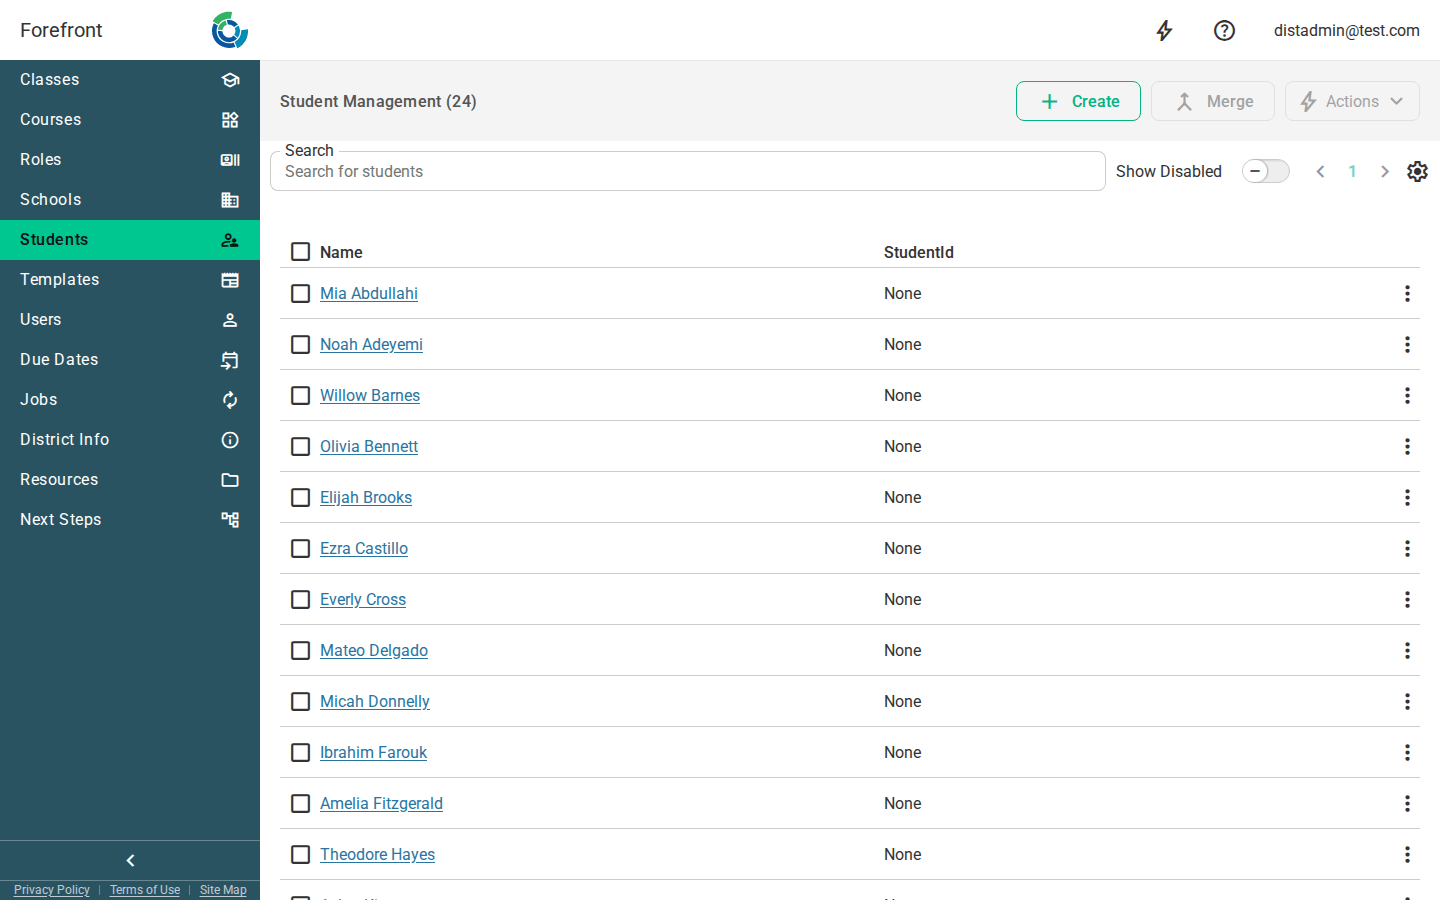
The student list
The page shows a table of students with a Name column, a StudentId column, a selection checkbox, and a per-row actions menu (⋮). The page title shows the total student count in parentheses. Click a student’s name to open that student’s record. If a student has no name on file, the row shows <Name Not Set>. The StudentId column lists each student’s external identifiers, labeled by their ID type.
Searching and paging
- Search: use the Search for students box to filter the list by name or ID. The list updates as you type.
- Pager: the pager moves through the results in pages. The total count is shown in the page title. Search and paging work together, so a search narrows the results the pager walks through.
Creating a student
Use the Create button in the top bar to add a student. The Create Student dialog asks for a First Name and Last Name (at least one is required), and drops you straight into the new student’s record when you save.
Preferred names
A student’s record has a Preferred Name field beside their first and last name. Fill it in for a student who goes by a different name, and leave it blank for everyone else. In a Clever district, Clever’s preferred name replaces this field at every sync, so change it in your student information system instead. Preferred names are on for Clever districts. Forefront support turns them on for everyone else. See Preferred Student Names.
Preferred language
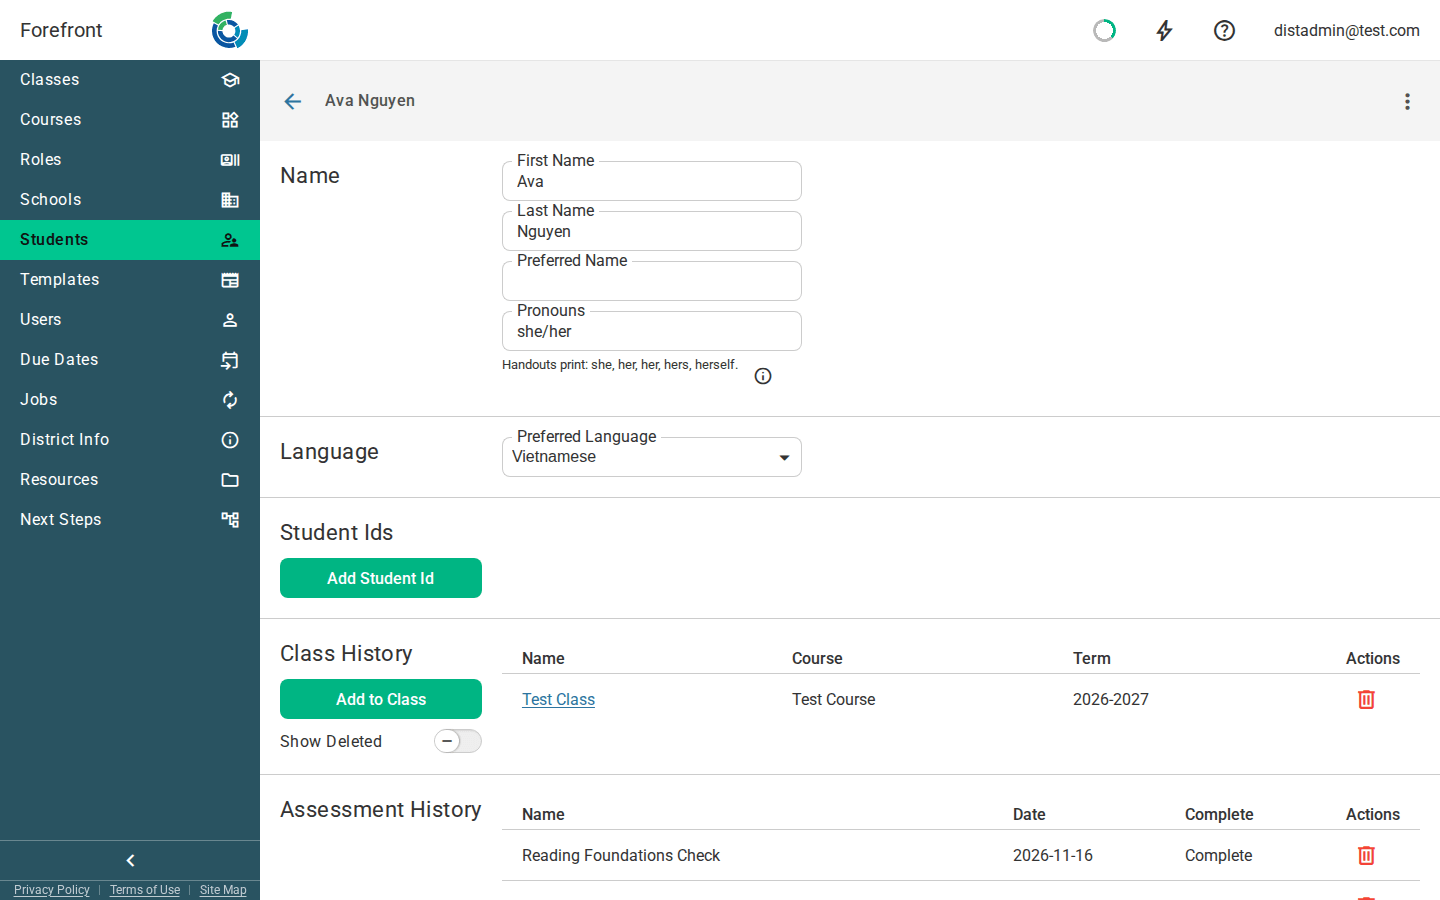
The Language section of a student’s record holds the language their family reads handouts in. It usually comes from your roster or Clever, and you can set or correct it here, but if your roster or Clever sends a language for the student, the next sync replaces your change. Translated handouts follow it when you download them with Each student’s preferred language, and in the parent portal. See Translating a Handout.
Pronouns
A student’s record also has an optional Pronouns field. Type them the way you want them to appear, such as “she/her” or “they/them”, and leave it blank for students without any on file. A roster file can fill this field in too. See Roster File Contents. If your district’s Clever sync sends pronouns, each sync replaces this field, so change them in your student information system instead.
Handouts can also use one word of a student’s pronouns in a sentence, such as “her” in “Practice will help her.” For she/her, he/him and they/them, type the set and handouts fill in the other words. For anything else, including mixed sets like “she/they”, type the five words handouts should print, in the same order as “she/her/her/hers/herself”. For a student who uses she/they and wants “they” on handouts, type “they/them/their/theirs/themselves”. Under the field, the page shows the words handouts will print, or says when it doesn’t recognize what you typed. When the field is blank, handouts use the student’s Gender demographic, and “they” forms if there isn’t one. See Text Block.
Row actions
Each row’s options menu (⋮) contains:
- Enabled: a toggle that enables or disables the student record. A disabled record is hidden from the default list but not permanently removed.
- Delete: permanently removes the record. This appears only for students that are already disabled, so a record must be disabled before it can be deleted for good.
Disabled rows appear dimmed in the table.
Bulk actions
Select students with the row checkboxes (or the header checkbox to select the whole page), then use the top-bar controls that light up:
- Actions menu: Enable Selected and Disable Selected to enable or disable every selected student at once, plus Clear Selected to drop the current selection. The menu is available once at least one student is selected.
- Merge: combines two or more selected students into one record. The Merge button becomes available once two or more students are selected. The merge dialog lets you pick which record to keep; the others are merged into it.
The header checkbox shows an indeterminate state when only some students on the page are selected.
Showing disabled students
Disabled students are hidden by default. Turn on the Show Disabled toggle to list only disabled students, so you can find a record to re-enable or to delete permanently. Turn it off to go back to enabled students.
When there are no results
If no students match the current search and filters, the table shows a No Students Found placeholder. Clear the search or adjust the Show Disabled toggle to look in the other list.
More about this page
- Add Student Accounts Manually: creating a student record here, then adding them to a class.
- Rostering in Forefront: the automated path, which is how most students arrive.
- One-Time Manual Roster Uploads
- Fixing Duplicate Students, Users, or Classes
- Demographic Data in Forefront
- Preferred Student Names