 Forefront
How to Access Next Steps Materials
What Next Steps materials are and how to reach them from a question on the spreadsheet, from the reports, and from the Next Steps library.
What are Next Steps materials?
Next Steps materials are instructional resources aligned to the skills on an assessment. They are available for the USNS, FRS, Bridges Third Edition, and DIBELS, and may have been configured by your district on a custom district assessment.
They reach you in two forms:
Library items. Activities published by Forefront (and by your district, if it authors its own), each aligned to the questions and standards it supports. They carry tags, such as the kind of activity or how long it takes, so a long list can be narrowed to what you need.
Links and files on a single question. Documents your district has attached directly to a question. These came first, so where a question has both you will see them labeled (legacy) to tell them apart from the library.
If your district has the Next Steps library, Next Steps also appears in the left sidebar. Everything below works the same either way. The library gives you more to reach.
Watch the short interactive demo below to see how to find and use the Next Steps libraries.
How to Access the Next Steps
From the Data-Entry Spreadsheet
Access the Next Steps from the right sidebar.
Click any cell to open the sidebar for that student and question.
Where the question has library materials, a Next Steps For Support row appears. Click it to open the library already filtered to that question, so you see its materials and nothing else.
Links and files attached to the question sit in the Next Steps For Support panel below that row.
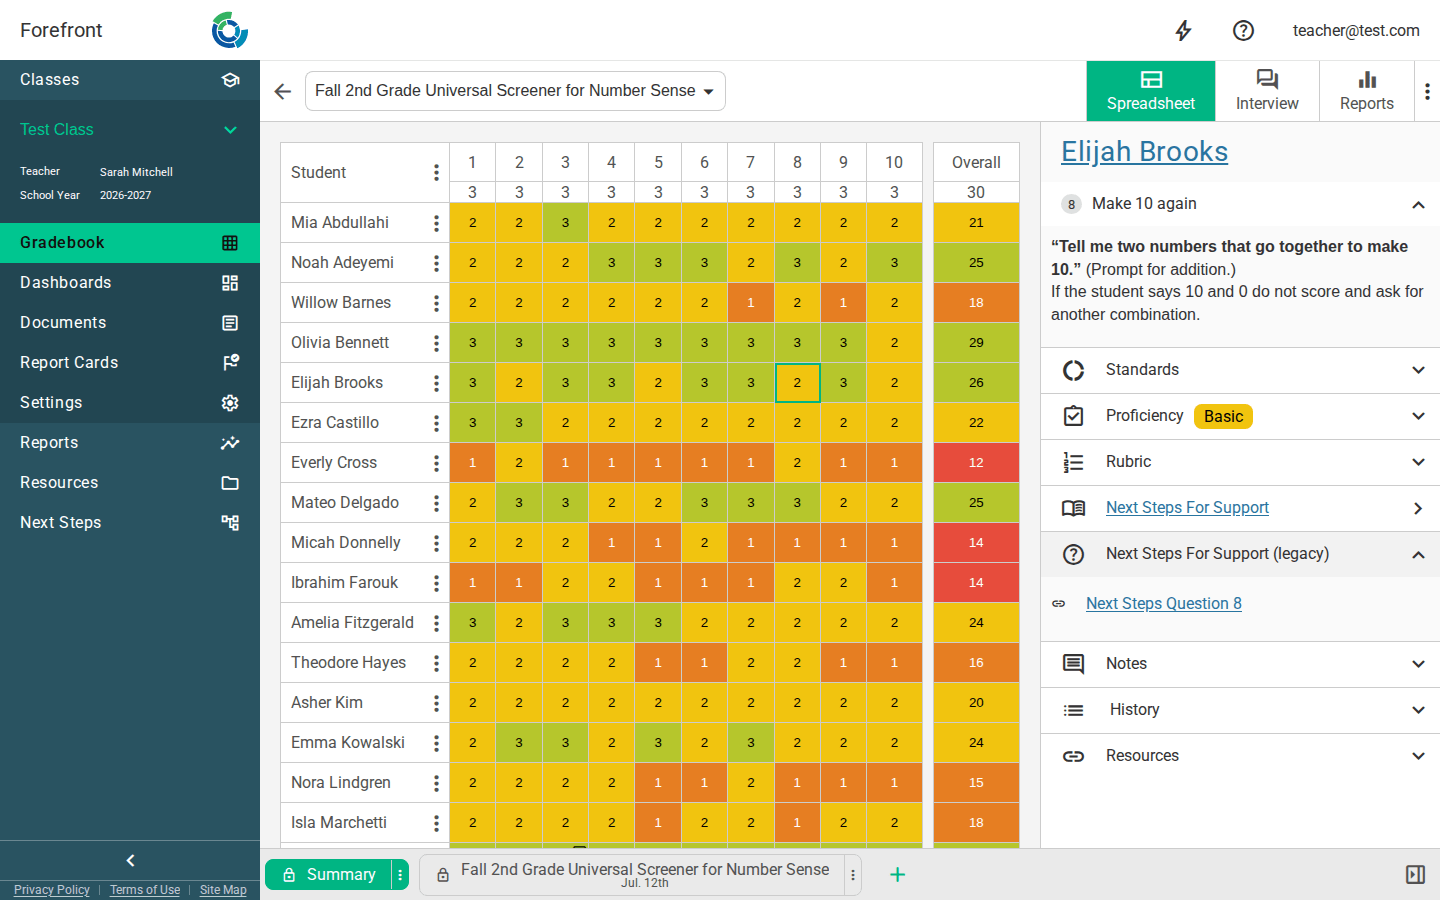
- Opens the library, filtered to this question
From the Reports
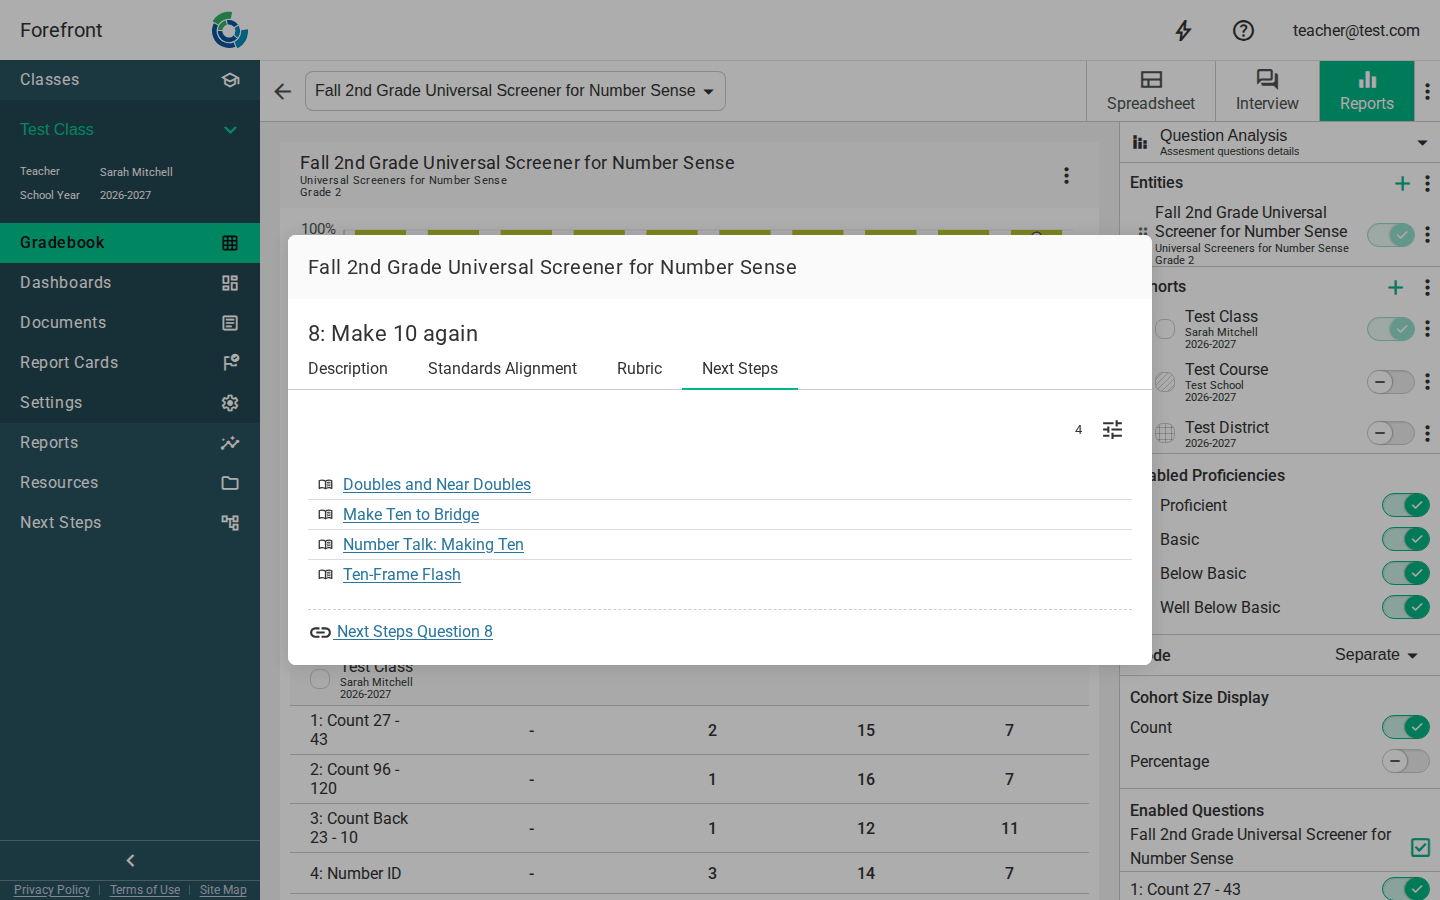
Access the Next Steps by clicking the number of the question below the columns.
Click the number (or letter) below a column to open that question, then choose the Next Steps tab.
Where the question has library materials, a Next Steps For Support row appears. It’s the same row as on the spreadsheet, and it goes to the same place: the library, filtered to that question.
Links and files attached to the question follow underneath.
From the Next Steps Library
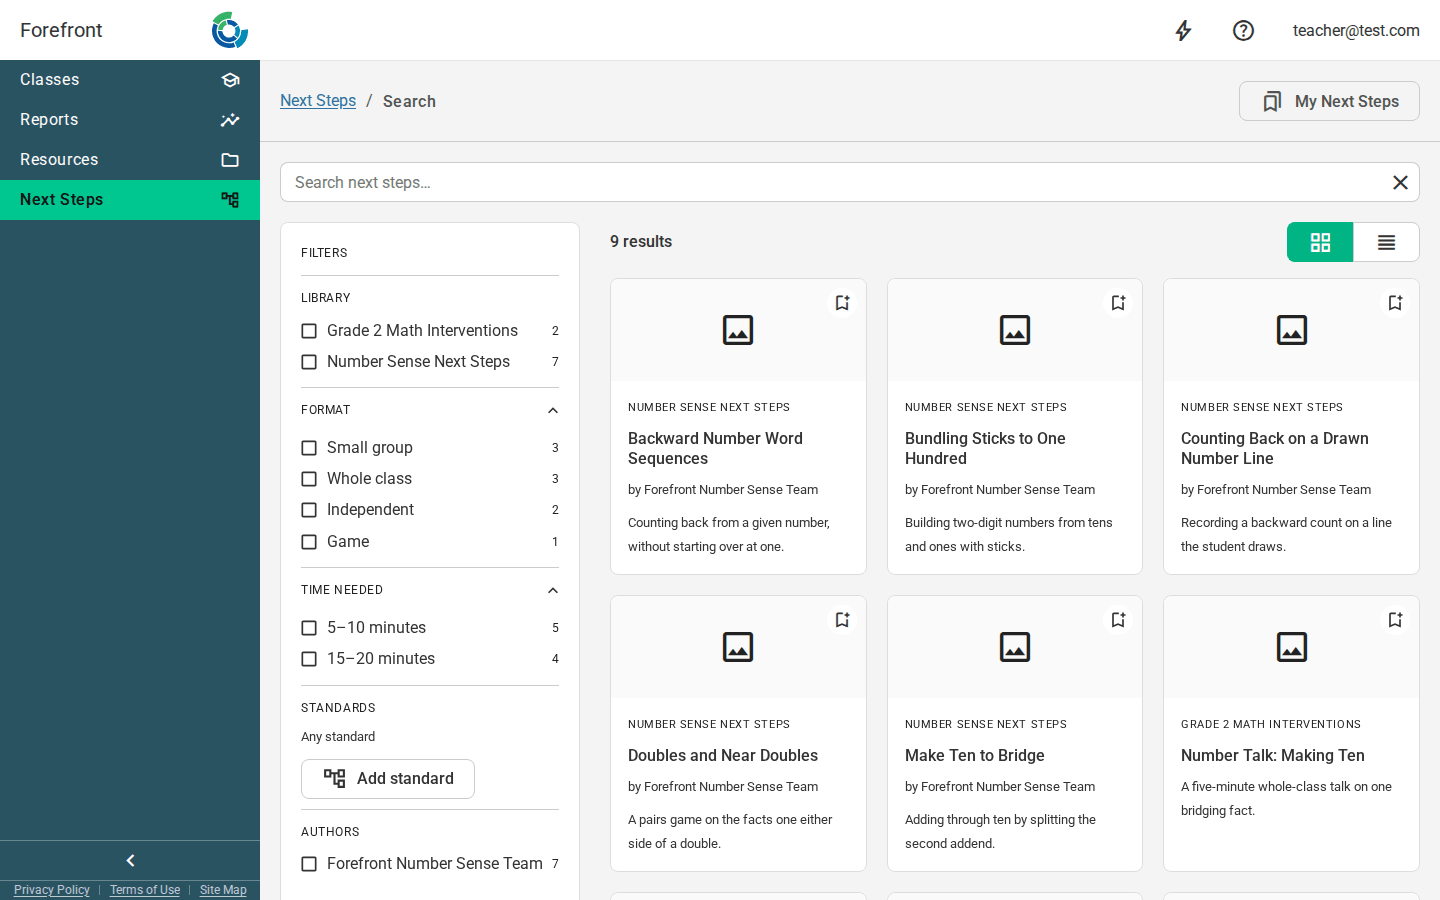
Starting from a question is the quickest route when you already have data in front of you. To search everything available to you instead, select Next Steps in the left sidebar.
Search by keyword, then narrow by library, tag, standard, question, or author.
Save an item to My Next Steps to keep it to hand, filing it in a folder if you want to group a few together.
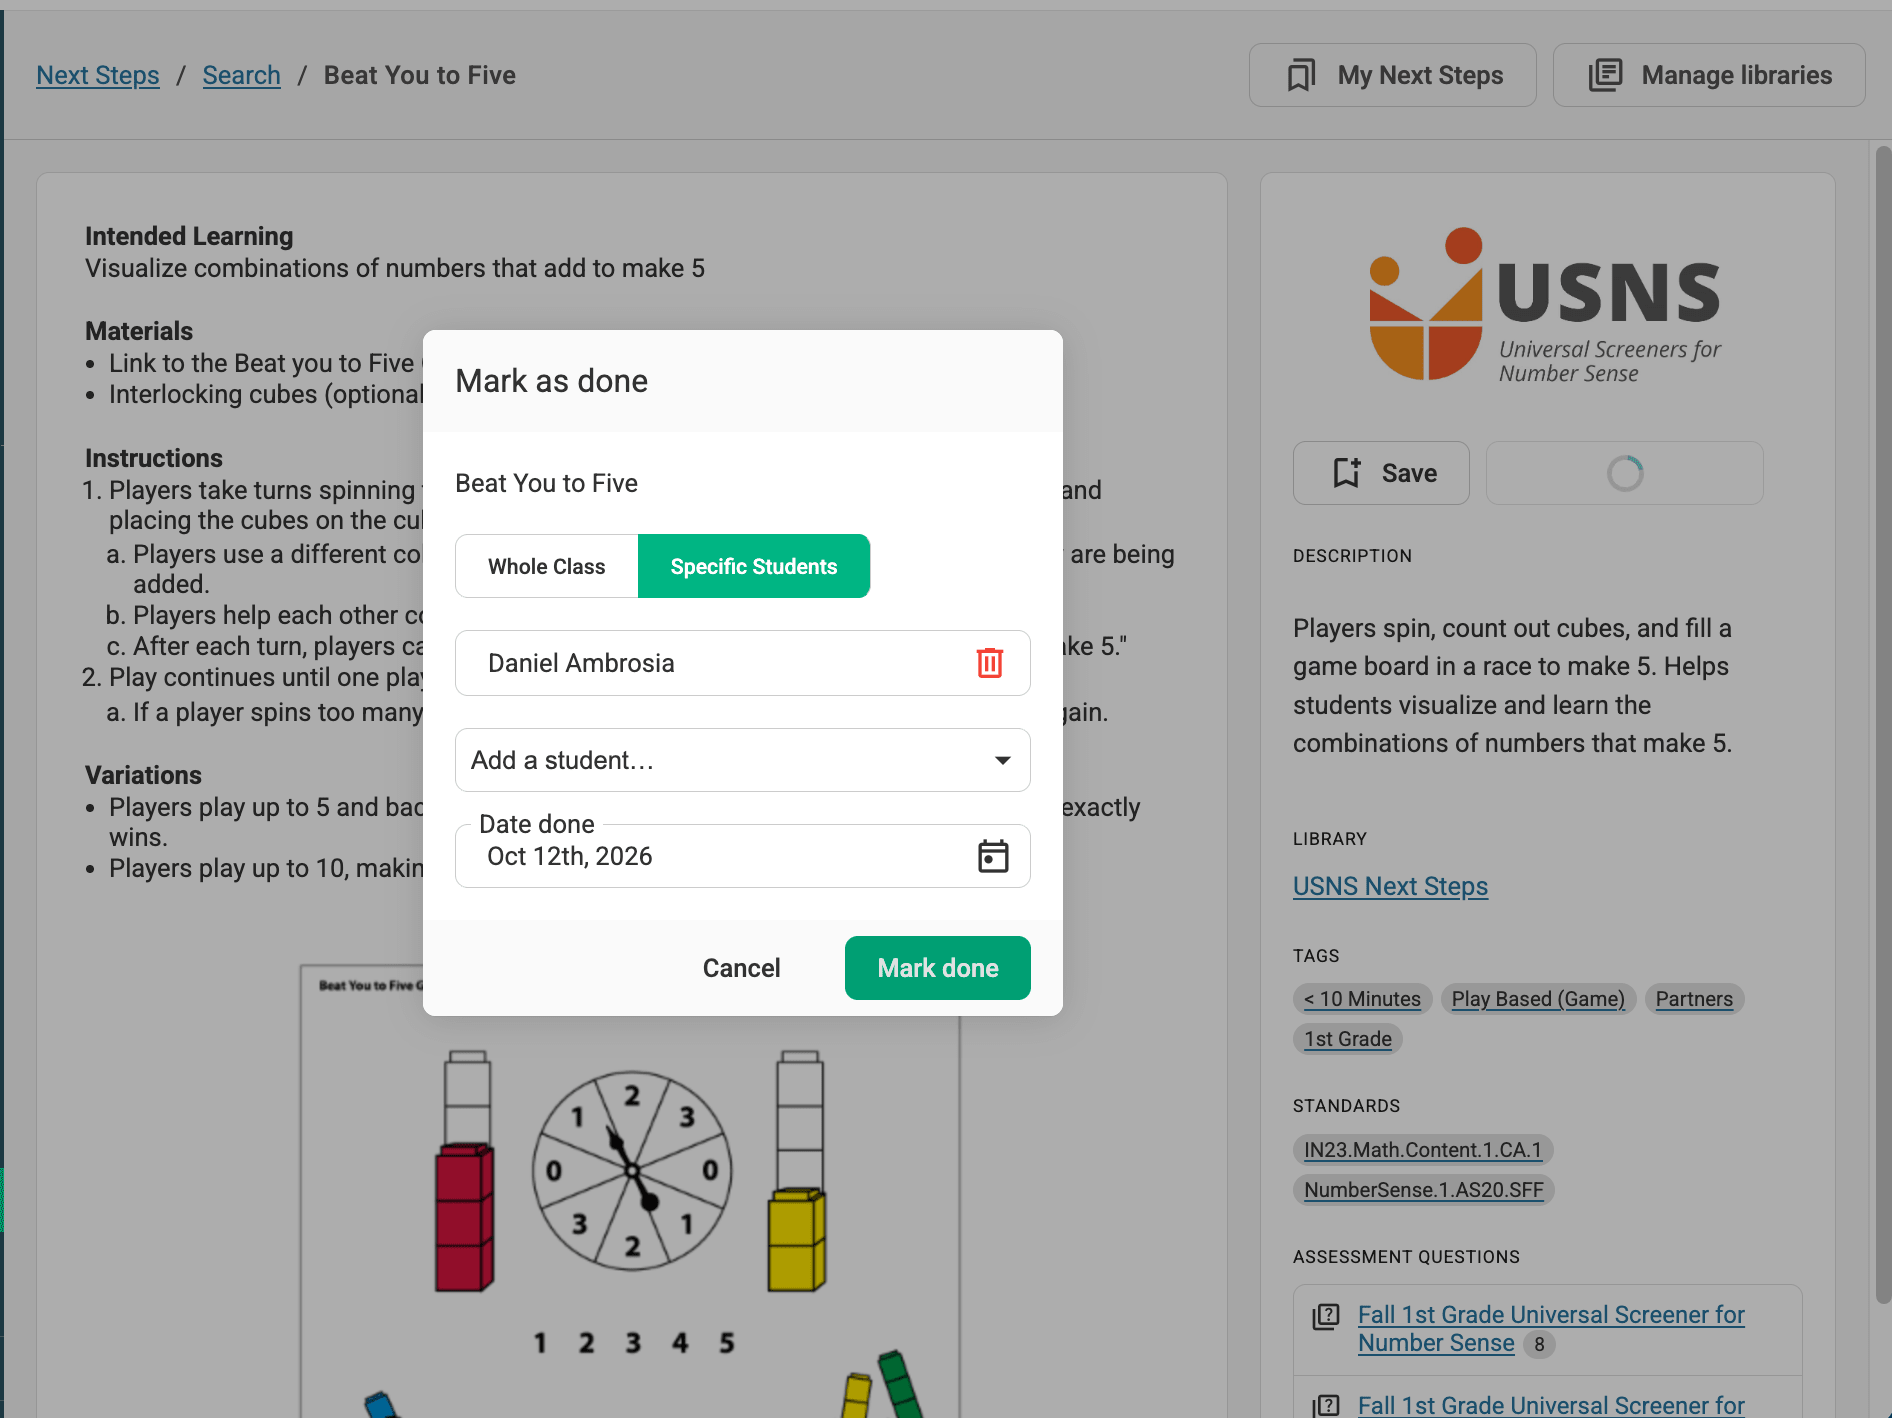
Mark as done records that you have used an item, for a whole class or for named students, on a date you choose.
The filters sit in a column on the left of the results. If there are more filters than fit on your screen, scroll that column to reach the rest. The results stay where they are, and Clear all stays at the top of the column. On a narrow screen, the filters move above the results and scroll with the page.
Each result is a card with a picture at the top. Where an item has a picture of its own and its library has a logo, the logo sits in a bar across the top of the picture, so you can tell at a glance which library the item comes from. The bookmark for saving the item sits at the right end of the same bar.
Items with slide decks
Some items include a slide deck, on its own or between instructions and questions. The deck plays one slide at a time, ready to present to your class, with the slide number underneath.
Click the slide, or use the › button, to advance. ‹ goes back.
Once you’ve clicked the slide (or tabbed to it), the keyboard works too: →, Page Down or Space to advance, ← or Page Up to go back, Home and End for the first and last slide.
On a slide that reveals its content a piece at a time, each click brings in the next piece, and the click after the last one moves to the next slide.
To present to the room, use the full screen button beside the slide number. The slide fills the display, the ‹ and › buttons stay at the bottom, and Esc brings you back.
Printing an item with a deck prints every slide in order, fully revealed.
For more on decks, see Slides.
Saving to a folder
Click the bookmark on a card, or Save on an item’s own page, to open the Save to list. Tick My Next Steps to save the item without a folder, or tick any of your folders to file it there. An item can sit in more than one folder.
To make a new folder, click New folder at the bottom of the list, type a name, and press Enter or click the check mark. The folder is created with the item already saved in it. Click the ×, or press Esc, to back out without making one.
You can also make folders on the My Next Steps page, which the My Next Steps button at the top of the Next Steps pages takes you to: click New folder at the bottom of the folder list. If you have a folder selected, the new one is made inside it.
Marking an item as done
After you use an activity with students, mark it as done to keep a record of what you’ve used.
Open the activity and select Mark as done.
Choose Whole Class, or Specific Students and add the students who completed it.
Choose the date the activity was done, then click Mark done.
You can mark the same activity as done more than once, so you can record each time you use it with different students or on different days.
Partner links in an item
Some items link to an activity on a partner’s website. Click the link on the item’s page and the partner’s site opens in a new tab with you already signed in, so there’s no separate account or password to remember.
Open it from Forefront. The sign-in is created at the moment you click, and works only once. So the link opens only from the item’s page in Forefront.
A printed copy shows the link’s name only. Paper can’t sign you in, so to use the link, open the item in Forefront.
If a link won’t open, point at it to see why. If it says it isn’t set up yet, the item is still being finished, so check back later or let us know.