 Forefront
Showing Content to Only Some Students
Use inclusion rules to show or hide a block, a table row, or a table column for each student, based on their proficiency, scores, or demographics.
Every student gets their own copy of a handout. An inclusion rule decides whether a block appears in a given student’s copy. You can add a practice tip only for students who haven’t reached proficiency yet, or a challenge activity only for students who have.
Rules work on any block, and on single rows and columns of a table.
Include or Exclude
Every rule starts with a choice between Include and Exclude:
- Include shows the block only to students who match the rule.
- Exclude hides the block from students who match the rule. Everyone else sees it.
Include, Fall screener proficiency is Below Basic or Basic: only those students see the block.
Exclude, Fall screener proficiency is Below Basic or Basic: every student sees the block except those students.
Adding a rule
- Click the block, or select several blocks to give them all the same rule.
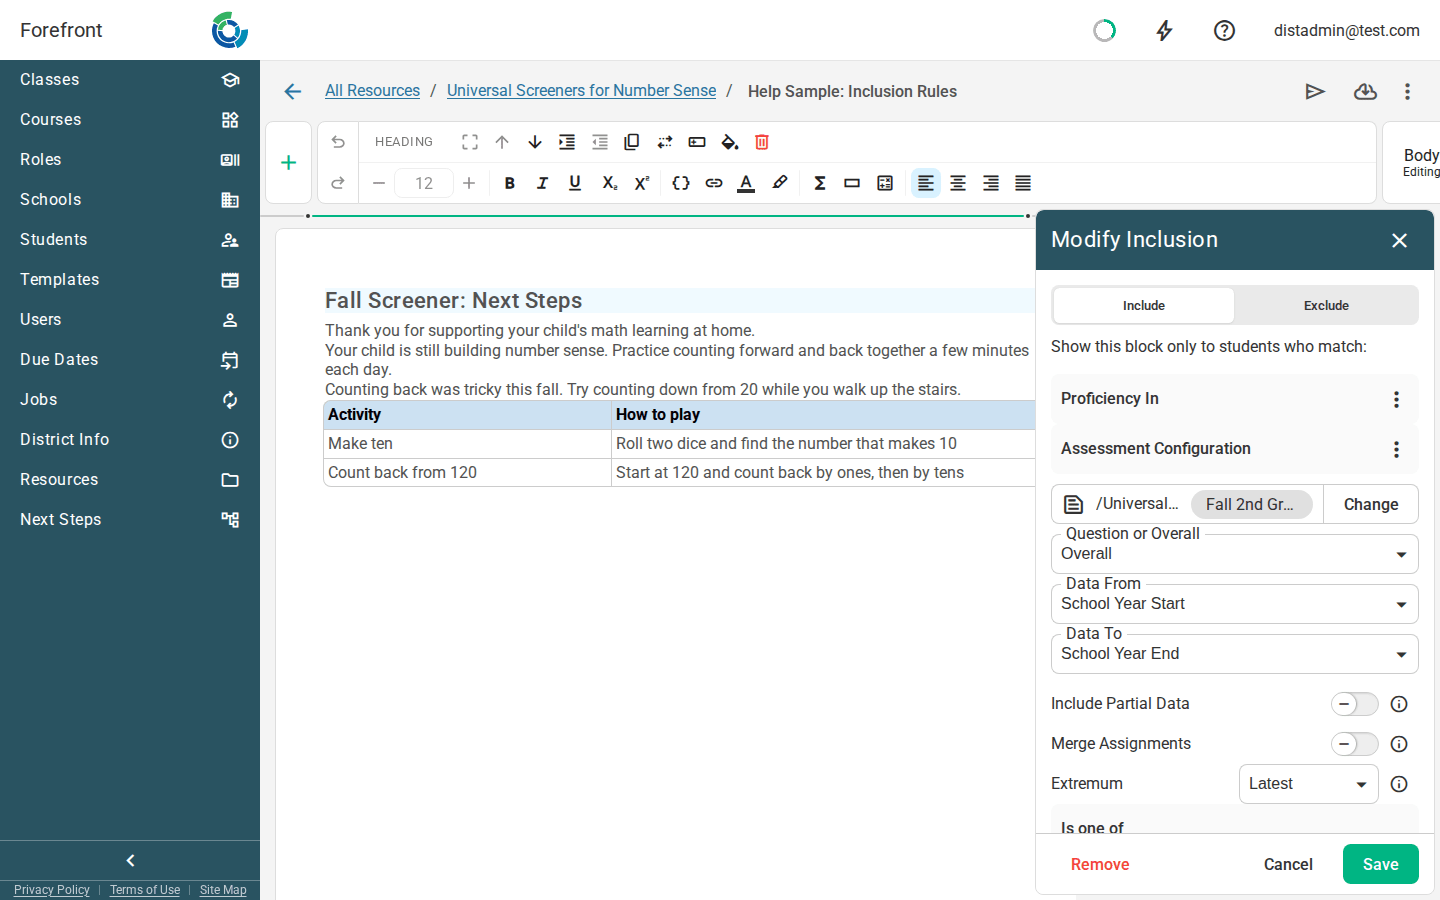
- Click Modify Inclusion (the button in the ribbon). The Modify Inclusion panel opens beside the handout.
- Choose Include or Exclude. The line under it reads back what you chose, for example “Show this block only to students who match:”.
- Under What is the choice based on?, choose Proficiency, Assessment Score, or Student Demographic, then fill in the settings described below.
- Click Save. It stays unavailable until the rule is complete.
If the handout already has rules near the block, the panel lists up to four of them under Suggestions. Click one to start from a copy of it.
What a rule can check
Proficiency
Matches students whose proficiency level is one of the levels you pick.
First choose where the proficiency comes from:
- Assessments. Pick an assessment, then Overall or a single question.
- Standards. Click Add Standards to pick one or more standards. Use Assessment Filter to count only some assessments toward them, and turn on Combine Standards to treat the standards as one.
Then set the window to read scores from with Data From and Data To. The usual choice is School Year Start to School Year End, so the rule reads whichever term the handout is printed for. Extremum decides which score counts when a student has more than one, such as the Latest or the Highest.
Finally, under Is one of, pick the Proficiencies that match. Your district’s names for the levels appear here, along with not assessed. A student with no score in the window counts as not assessed, so they match only if you pick that level.
Assessment Score
Matches students whose score on an assessment, or on one question, falls between a Min Score and a Max Score, including both ends. It takes the same assessment, window, and Extremum settings as a proficiency rule.
A student with no score in the window doesn’t match. With Exclude, that means students who haven’t taken the assessment still see the block.
Student Demographic
Matches students by a demographic your district keeps, such as a program or language. Choose the Demographic, then one or more Values. With Require All off, a student matches if they have any of the values. With it on, they need all of them.
Combining conditions
A rule can check more than one thing. Click the ⋮ menu beside a condition and choose Add Condition. The rule becomes Multiple Conditions, with your first condition inside it. Click + to add the next one.
Require All Conditions decides how they combine:
- On: a student has to match every condition.
- Off: matching any one condition is enough.
Each condition in the list has its own ⋮ menu, so a condition can hold its own group. For example, “below proficient on the screener, and either in the after-school program or an English learner”.
Include and Exclude apply to the whole rule. With Exclude, a student who matches the combined rule doesn’t see the block.
Reading a rule
A block with a rule has a bar in the right margin of the editor. Point at the bar to see a summary of the rule, and click it to open the rule in the panel.
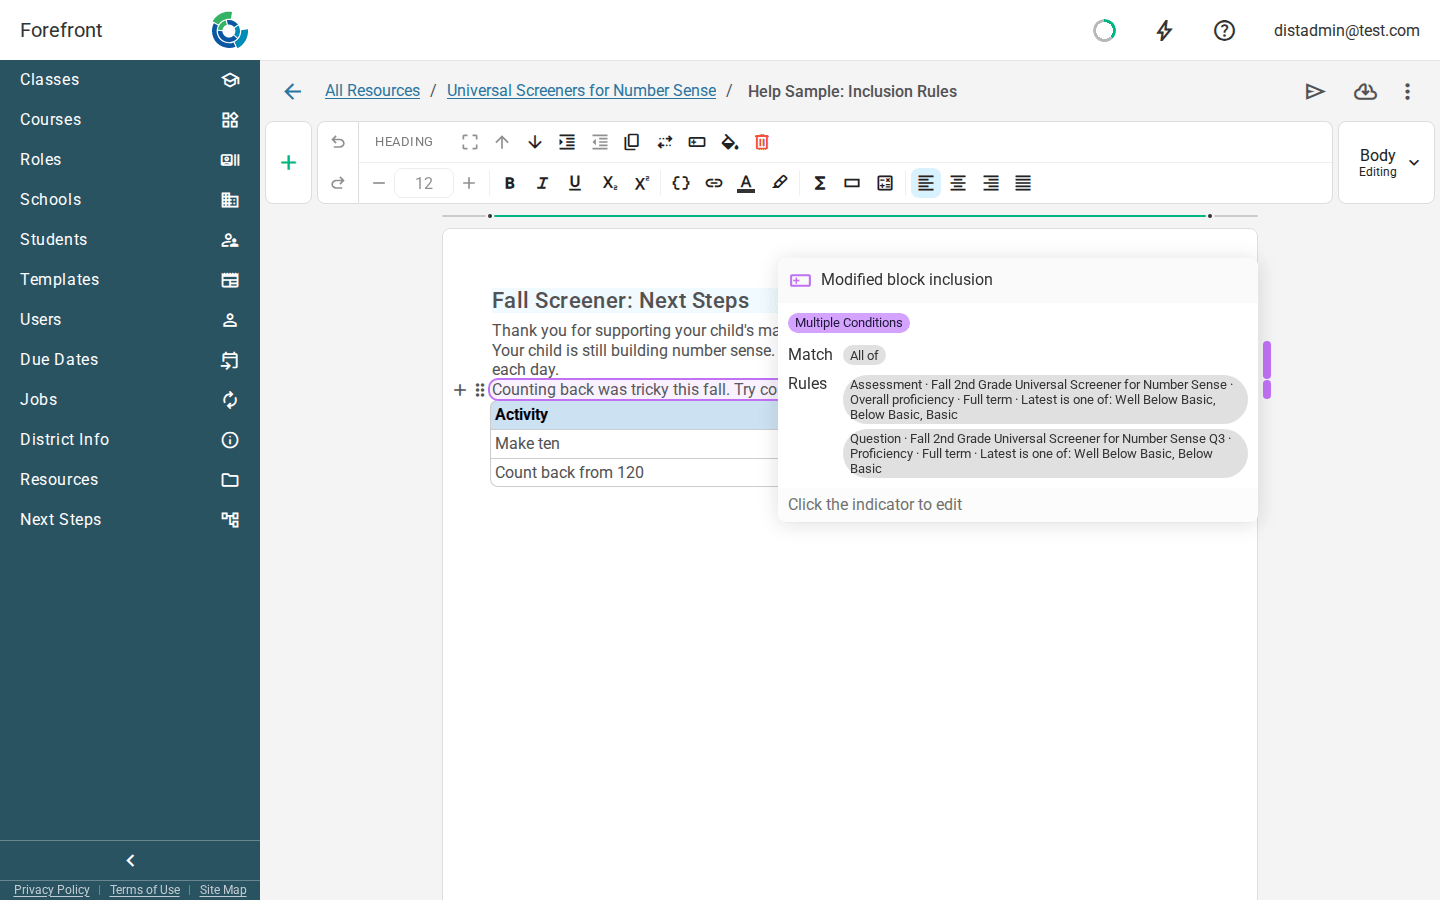
The summary lists what the rule checks: the assessment or standards, the window, and the levels or score range that match. Match shows whether the conditions are All of or Any of. A rule set to Exclude reads as the opposite, such as Is not one of or Score not between.
The bar looks the same for Include and Exclude, so read the summary to tell them apart.
Rows and columns in a table
To show a row or column to only some students, click a cell in it, then choose Modify row inclusion on the Row tab or Modify column inclusion on the Column tab. You can also right-click the cell. The panel and the choices are the same as for a block. Students the rule leaves out get the table without that row or column.
A row or column with a rule is marked with a thin bar just outside the table: to the left of the row, or above the column. The bar is always showing. Point at the bar to read the rule, and click it to change the rule.
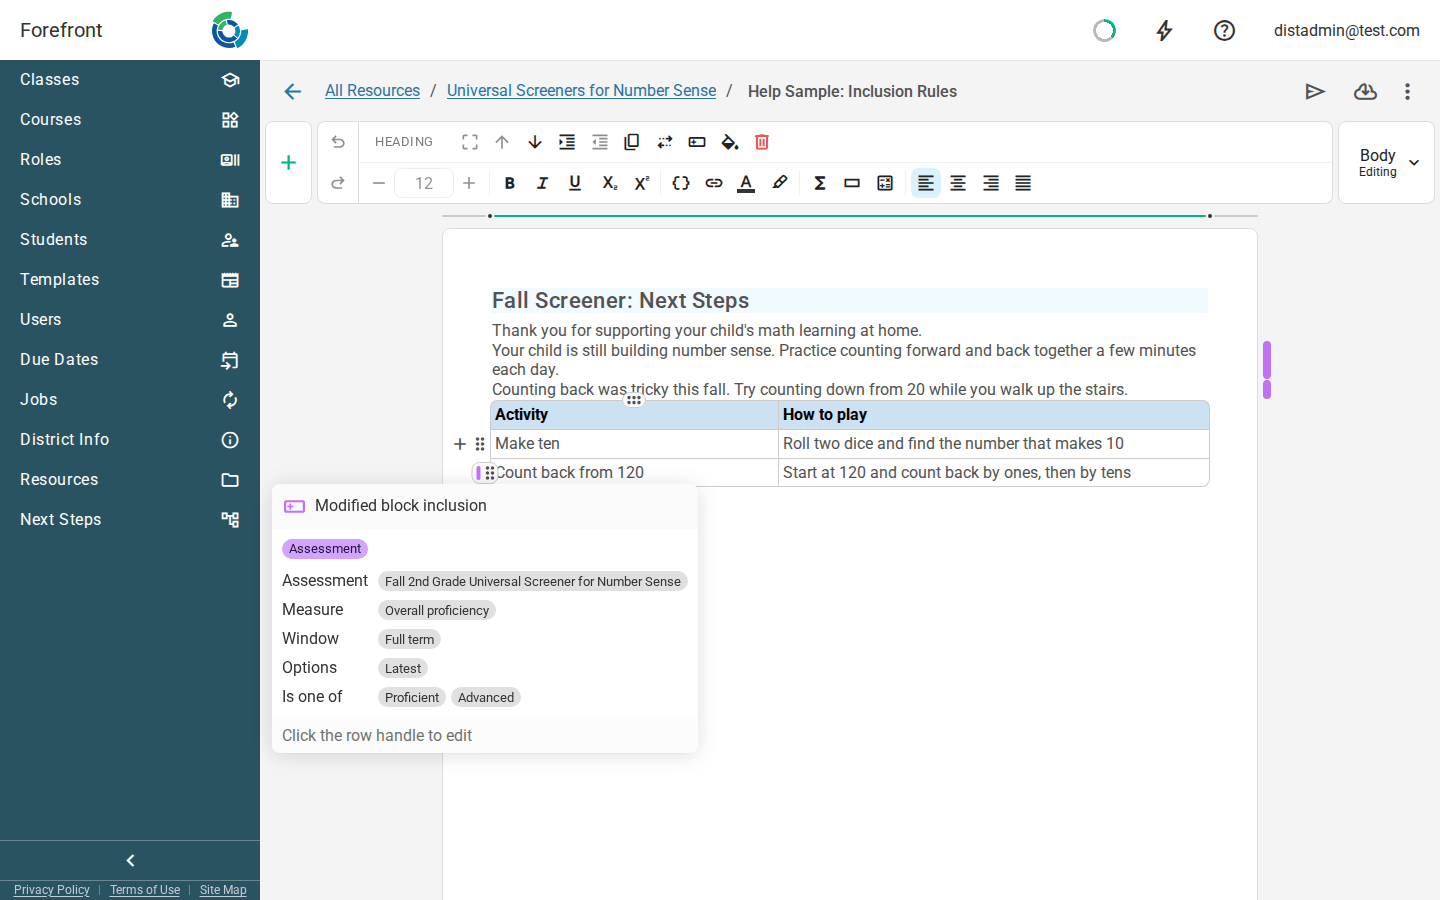
With several cells selected, Modify Inclusion sets a rule on whole rows or whole columns when that’s what you selected, and on the blocks inside the cells otherwise. When the selection already has different rules, the panel says so, and saving gives them all the one you set. Select the whole table to give the table itself a rule.
Report cards
The report card editor uses the same Modify Inclusion panel and the same three kinds of rule, on any block in a report card’s fragments. For example, you can show a note about intervention support only to students below proficiency on a standard.
Rules aren’t available in report card notes or in guardian email and page templates.
Checking a rule
The editor shows every block, with or without a rule. To see one student’s copy:
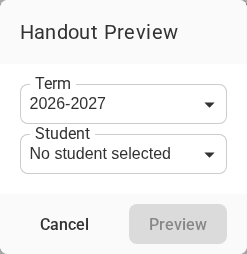
- Click Preview (the button at the top of the editor).
- Choose a Term and a Student, then click Preview.
The preview leaves out every block, row, and column whose rule doesn’t match that student. Try one student who should see the content and one who shouldn’t.
Changing or removing a rule
Click the bar beside the block (or beside the row or column) to open the rule. Change it and click Save, or click Cancel to leave it as it was.
To take the rule off, click Remove and confirm. The block then appears for every student.
To start a condition over, choose Reset from its ⋮ menu. To drop one condition from Multiple Conditions, click the trash icon at the end of its row. When only one condition is left, it goes back to being a single condition.