 Forefront
Handout Blocks
Every kind of block you can add to a handout, what each one is for, and how to work with them.
A handout is built from blocks, stacked down the page. Each paragraph, heading, table, image, and QR code is its own block. You add them one at a time, then move, copy, and change them as you go.
This page lists every kind of block. Select a block’s name to learn how to add it, what its settings do, and how it looks on paper and in email.
Adding a block
There are three ways to add a block, and they all offer the same list:
- The + button. The + at the far left of the ribbon adds a block below the one you’re in. There’s also a + beside each block, in the left margin, when you point at it.
- Right-click. Right-click a block and choose Create.
- The / menu. Type / in a line of text, or select a block and press /. Keep typing to narrow the list. See Slash Commands for everything the menu can do.
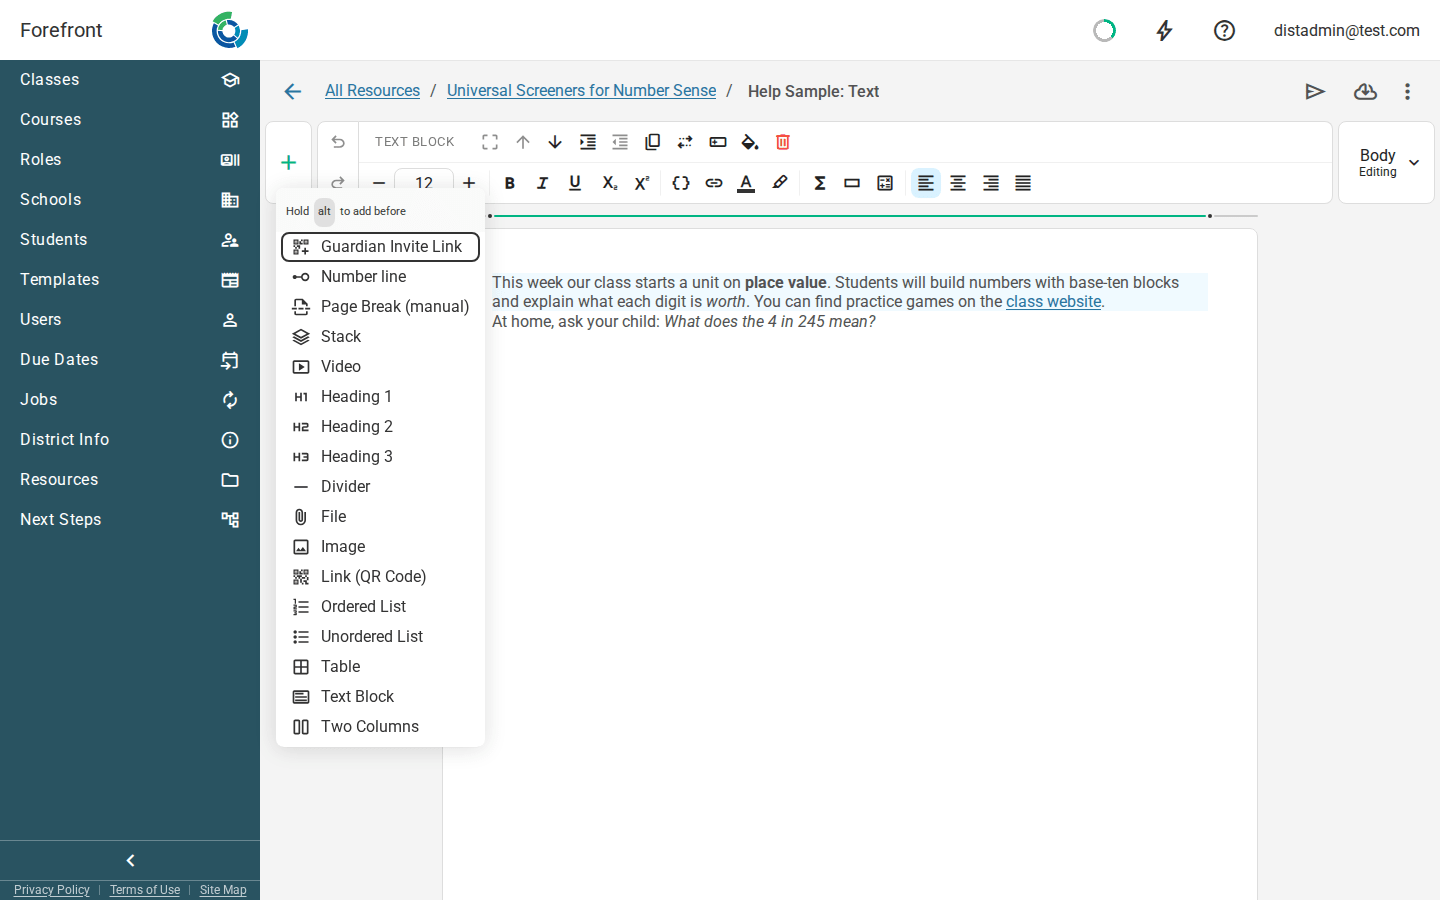
The list only shows blocks that fit where you are. For example, it doesn’t offer a table when you’re already in a table cell.
The blocks
Text
| Block | What it’s for |
|---|---|
| Text Block | Paragraphs of text, with formatting, links, math, and dynamic text |
| Heading Block | Section titles, in three sizes |
| List Block | Numbered and bulleted lists |
Layout
| Block | What it’s for |
|---|---|
| Table Block | A grid of rows and columns, with merged cells, borders, and backgrounds |
| Two Columns Block | Two blocks side by side |
| Stack Block | Blocks layered on top of each other, each placed exactly where you want it |
| Divider Block | A line across the page between sections |
| Page Break Block | Starts a new printed page |
Media and links
| Block | What it’s for |
|---|---|
| Image Block | A picture you upload |
| File Block | A file readers can download, which can print as a QR code |
| Video Block | A video that plays in Forefront and prints as a QR code |
| Link (QR Code) Block | A web address as a QR code and a link |
| Guardian Invite Link Block | A QR code each student’s guardian can scan to create a Forefront account |
Math and report cards
| Block | What it’s for |
|---|---|
| Number Line Block | A number line marked with points, rays, intervals, jumps, and blanks |
| Report Card Note Block | The teacher’s note for a report card descriptor. Only offered in a report card’s fragments. |
Where some blocks aren’t available
Most blocks can go anywhere, but a few places offer fewer:
| Where | Not available |
|---|---|
| Handout and report card headers and footers | Page Break |
| Guardian email templates | Guardian Invite Link, Page Break, Stack, Number line |
| Guardian page templates | Guardian Invite Link, Page Break |
| Assessment and question instructions | Video, Number line, Page Break, Stack, Guardian Invite Link |
| Inside a table, two columns, or a stack | Varies. See that block’s page. |
Working with blocks
These actions work the same way on any block that offers them. Most work on every block. Where one doesn’t, it says which blocks it applies to.
Moving, copying, and deleting
- Move: drag the ⋮⋮ handle in the left margin. You can also choose Move Up or Move Down from the right-click menu or the ribbon. Drop a block on the left or right edge of another block to put the two side by side in two columns.
- Copy: Duplicate puts a copy right below. You can also copy and paste with Ctrl+C and Ctrl+V (Cmd on a Mac). Ctrl+Shift+V pastes without formatting.
- Delete: choose Delete in the ribbon or the right-click menu.
- Undo: Ctrl+Z. Ctrl+Shift+Z redoes.
To act on several blocks at once, drag across the page background to select them, or hold Shift and press ↑ or ↓. Pressing Ctrl+A twice selects every block.
Margins
Adjust margins in the right-click menu sets a block’s Left and Right margins, in inches, up to 2.5 inches each. Tab pushes the selected block in from the left, and Shift+Tab brings it back. In a list, Tab nests the item instead.
Margins aren’t available for page breaks, stacks, or blocks inside a stack.
Color
Colors in the ribbon sets the color of a block’s text or its background. You can use it on text blocks, headings, lists, link blocks, guardian invite links, and report card notes. Reset Color puts it back.
Showing a block to only some students
Modify Inclusion in the ribbon decides which students’ copies include a block. For example, you might include a paragraph only for students who haven’t met a standard yet. Choose Include or Exclude, then describe the students it applies to.
To combine more than one condition, open the menu (⋮) beside the condition and choose Add Condition. Your condition becomes the first in a Multiple Conditions list, with an empty one beneath it for you to fill in. Turn on Require All Conditions to match students who meet every condition, or turn it off to match students who meet any of them. Click + to add another condition.
To take a condition out of the list, click the trash icon at the end of its row. When only one condition is left, it goes back to being a single condition.
A block with a rule is marked with a bar in the right margin. Point at the bar to see the rule, and click it to change the rule.
Tables can also include or leave out single rows and columns, with Modify row inclusion and Modify column inclusion.
See Showing Content to Only Some Students for how to build a rule and check it with a student preview.